Global Settings
Global Settings lets you to configure default values for options such as row max-width, margin/padding, breakpoints, and custom code (CSS & JavaScript) which are then applied globally on your site. You can override the majority of these settings on a per row, column and module basis via their settings.
Access Global Settings
Global Settings can be accessed via the Tools menu, or using the keyboard shortcut:
- command ⌘ + U ( Mac)
- Ctrl + U ( Windows).
Default Page Heading
The Default Page Heading option lets you show or hide the default theme heading for the Page post type.
Show gives you two choices, these are Yes or No. When Yes is chosen, the theme's page title will display on your Beaver Builder layouts. When choosing No, you must enter the CSS selector for your active theme's page heading for this feature to work.
CSS Selector allows you to enter the theme's CSS selector for the page title. The default selector
.fl-post-headeris used to hide the page title for the BB Theme.
To learn how to hide the page title for third-party themes, visit the Show or hide the page title article.
Row Spacing
Margin/Padding
Configure the default margin and padding value for all directions (top, right, bottom, and left) for rows globally. Use the responsive settings to enter values on a per device basis (large, medium, and small).
Margin accepts
px, or%CSS units. The default value is0px.Padding access
px,em, or%CSS units. The default value is20px.
Apply to Box
When enabled, global row spacing also applies to Box modules within the top-level layout.
Row Defaults
Max Width
Lets you set the default max-width for all rows using px, vw or % CSS units.
The default value is 1100px.
Default Row Width
Choose between Fixed or Full-width as the default setting for all rows. Selecting Fixed removes the Default Row Content Width option. You can override this setting for individual rows through the row settings.
Default Row Content Width
Choose between Fixed or Full-width which will be the default for all rows. You can override this on a per row basis via the row settings.
Column Spacing
Margin/Padding
Configure the default margin and padding value for all directions (top, right, bottom, and left) for columns globally. Use the responsive settings to enter values on a per device basis (large, medium, and small).
Margin accepts
px, or%CSS units. The default value is0px.Padding access
px,em, or%CSS units. The default value is0px.
Module Spacing
Margin
Configure the default margin value for all directions (top, right, bottom, and left) for modules globally. Use the responsive settings to enter values on a per device basis (large, medium, and small).
- Margin accepts
px, or%CSS units. The default value is0px.
Modules do not support Padding.
Responsive Layout
Enable/Disable
Enable or Disable the Responsive Layout settings, these include:
- Auto Spacing
- Large Device Breakpoint
- Medium Device Breakpoint
- Small Device Breakpoint
- Enable Col Max-width
- Reverse Column Stacking Order
When Disabled only Base Font Size is available.
Auto Spacing
Auto Spacing removes the requirement to manually configure margin and padding settings for each row and column on small devices, ensuring consistent spacing throughout the layout. This simplifies the design process and can result in considerable time and effort savings.
When enabled (default), Auto Spacing configures the margin to
0pxfor all directions and the padding-left and padding-right to0pxfor both rows and columns on small devices. The padding-top and padding-bottom inherit the values configured in the Global Settings or those defined for the small device size in the row or column settings.The CSS code snippet below displays how the CSS is represented for both rows and columns on small devices.
@media (max-width: 768px) {
  .fl-row[data-node] .fl-row-content-wrap {
    margin: 0;
    padding-left: 0;
    padding-right: 0;
  }
  .fl-col[data-node] .fl-col-content {
    margin: 0;
    padding-left: 0;
    padding-right: 0;
  }
}
If you disable Auto Spacing, the margin and padding values set for desktop will be inherited by the small device size instead.
If you need more precise control over the spacing of rows and columns on small devices, you can modify the margin and padding options for each row and column individually. These options can be found in the Advanced Tab for the specific row and column that you are currently working on.
Large Device Breakpoint
The Large Device Breakpoint setting lets you configure the max-width at which the layout will adjust for large devices. The default value is 1200px.
Medium Device Breakpoint
The Medium Device Breakpoint setting lets you configure the max-width at which the layout will adjust for medium devices. The default value is 992px.
Small Device Breakpoint
The Small Device Breakpoint setting lets you configure the max-width at which the layout will adjust for small devices. The default value is 768px.
See the Breakpoints article for more information.
Use Responsive Settings in Previews?
When Enabled (Yes) the Beaver Builder Preview and Responsive Editing will use the Large Device Breakpoint, Medium Device Breakpoint, and Small Device Breakpoint.
When Disabled (No) the Beaver Builder Preview and Responsive Editing will use the hard-coded values which are 1200px for Large, 769px for Medium, and 360px for Small devices.
Enable Column Max Width
When Enabled, columns assigned 50% width or less are limited to max-width: 400px when screen width reaches or goes below the Small Device Breakpoint.
Base Font Size
If Font Size in the Typography settings is set to the vh or vw CSS unit the Base Font Size will be used to calculate the font size.
CSS & JavaScript
The CSS and JavaScript tabs allow you to apply custom CSS and JavaScript globally throughout the site. If custom CSS or JavaScript have been added, a green dot appears next to the Global Settings menu item.

Debug Mode lets you access any code you've added to the Global Settings and Layout CSS & JavaScript options, so you can troubleshoot whether your custom code is causing a conflict with Beaver Builder.
CSS tab
The CSS tab allows you add custom CSS that applies globally to your site. You can learn more from the Custom CSS article.
JavaScript tab
The JavaScript tab allows you add custom JavaScript that applies globally to your site. You can learn more from the Custom JavaScript article.
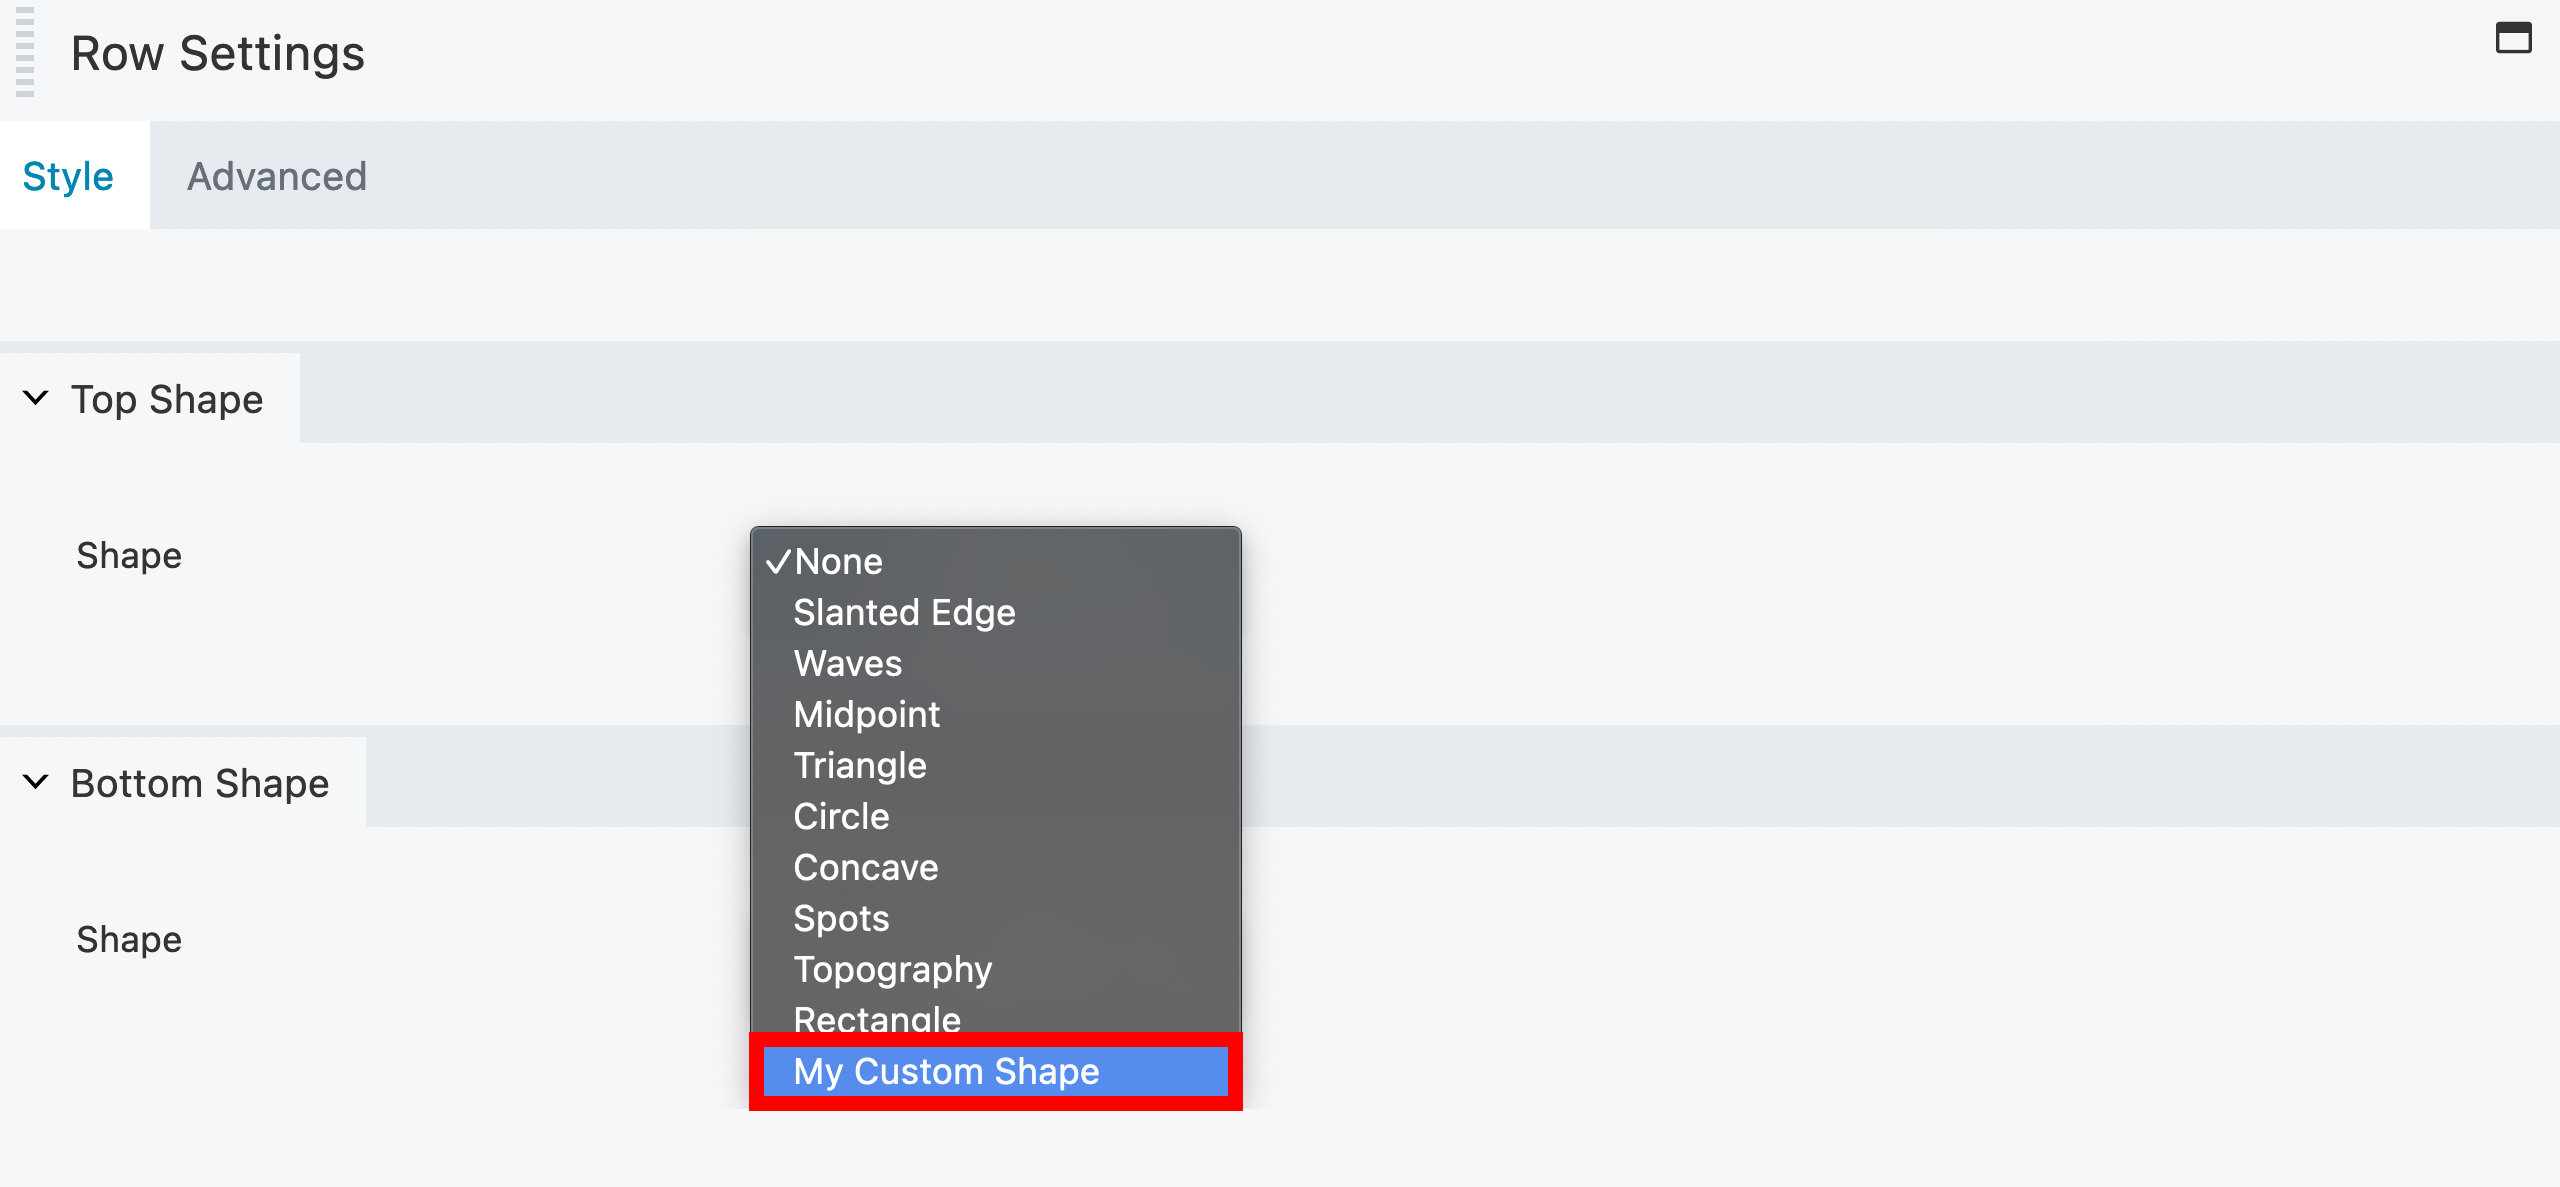
Custom Row Shapes
In the Shapes tab, you can upload custom shapes without writing any code. When setting the top or bottom shape for a row, you can choose the custom shapes from the list.
Click the Edit Shape or Add New button.
Specify the name of your custom shape, which will appear in the top or bottom shape options in the row settings.
An SVG file defining a shape is required. An application or generator for vector graphics can be used if you need to create one.
Paste your SVG code into the SVG Code option and save.
When you open the row settings your custom shape will be available.