WordPress Custom Fields
WordPress Custom Fields is a feature in WordPress which allows you to add additional information to your pages, posts, and custom post types. You do this by adding a key which is the custom field name and a value which is the information you want to display on your page or post. You can then use Beaver Themer field connections to display this data into your layout.
Enable WordPress Custom Fields
By default, Custom fields are hidden. You can make the custom fields panel visible on your post edit screen in two ways depending on whether you're using the default WordPress editor (Gutenberg) or the Classic Editor plugin.
When the Advanced Custom Fields plugin is installed and active on your website, the functionality of WordPress custom fields is deactivated. To utilize WordPress custom fields, you need to disable the Advanced Custom Fields plugin.
Block Editor (Gutenberg)
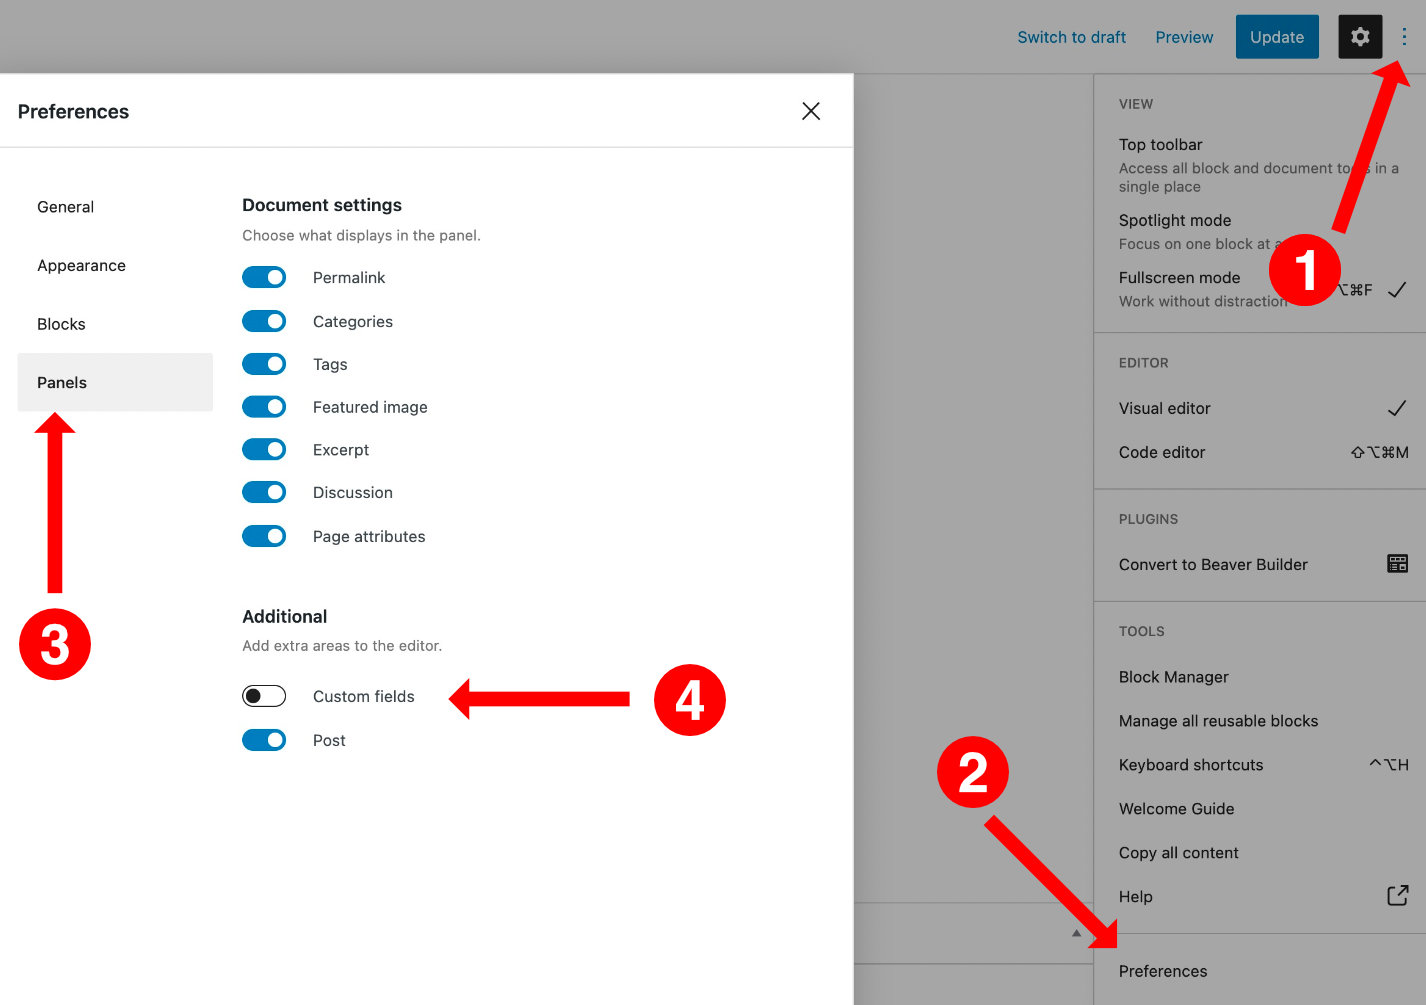
To enable WordPress custom fields while utilizing the Block editor, follow these steps:
- On the WordPress Edit Screen for pages or posts and access the Options panel by clicking the () vertical ellipsis icon.
- Choose Preferences from the dropdown menu.
- In the popup window, select the Panel option.
- Toggle the Custom Fields option to enable and finalize the process by clicking the Enable & Reload button.

Classic Editor Plugin
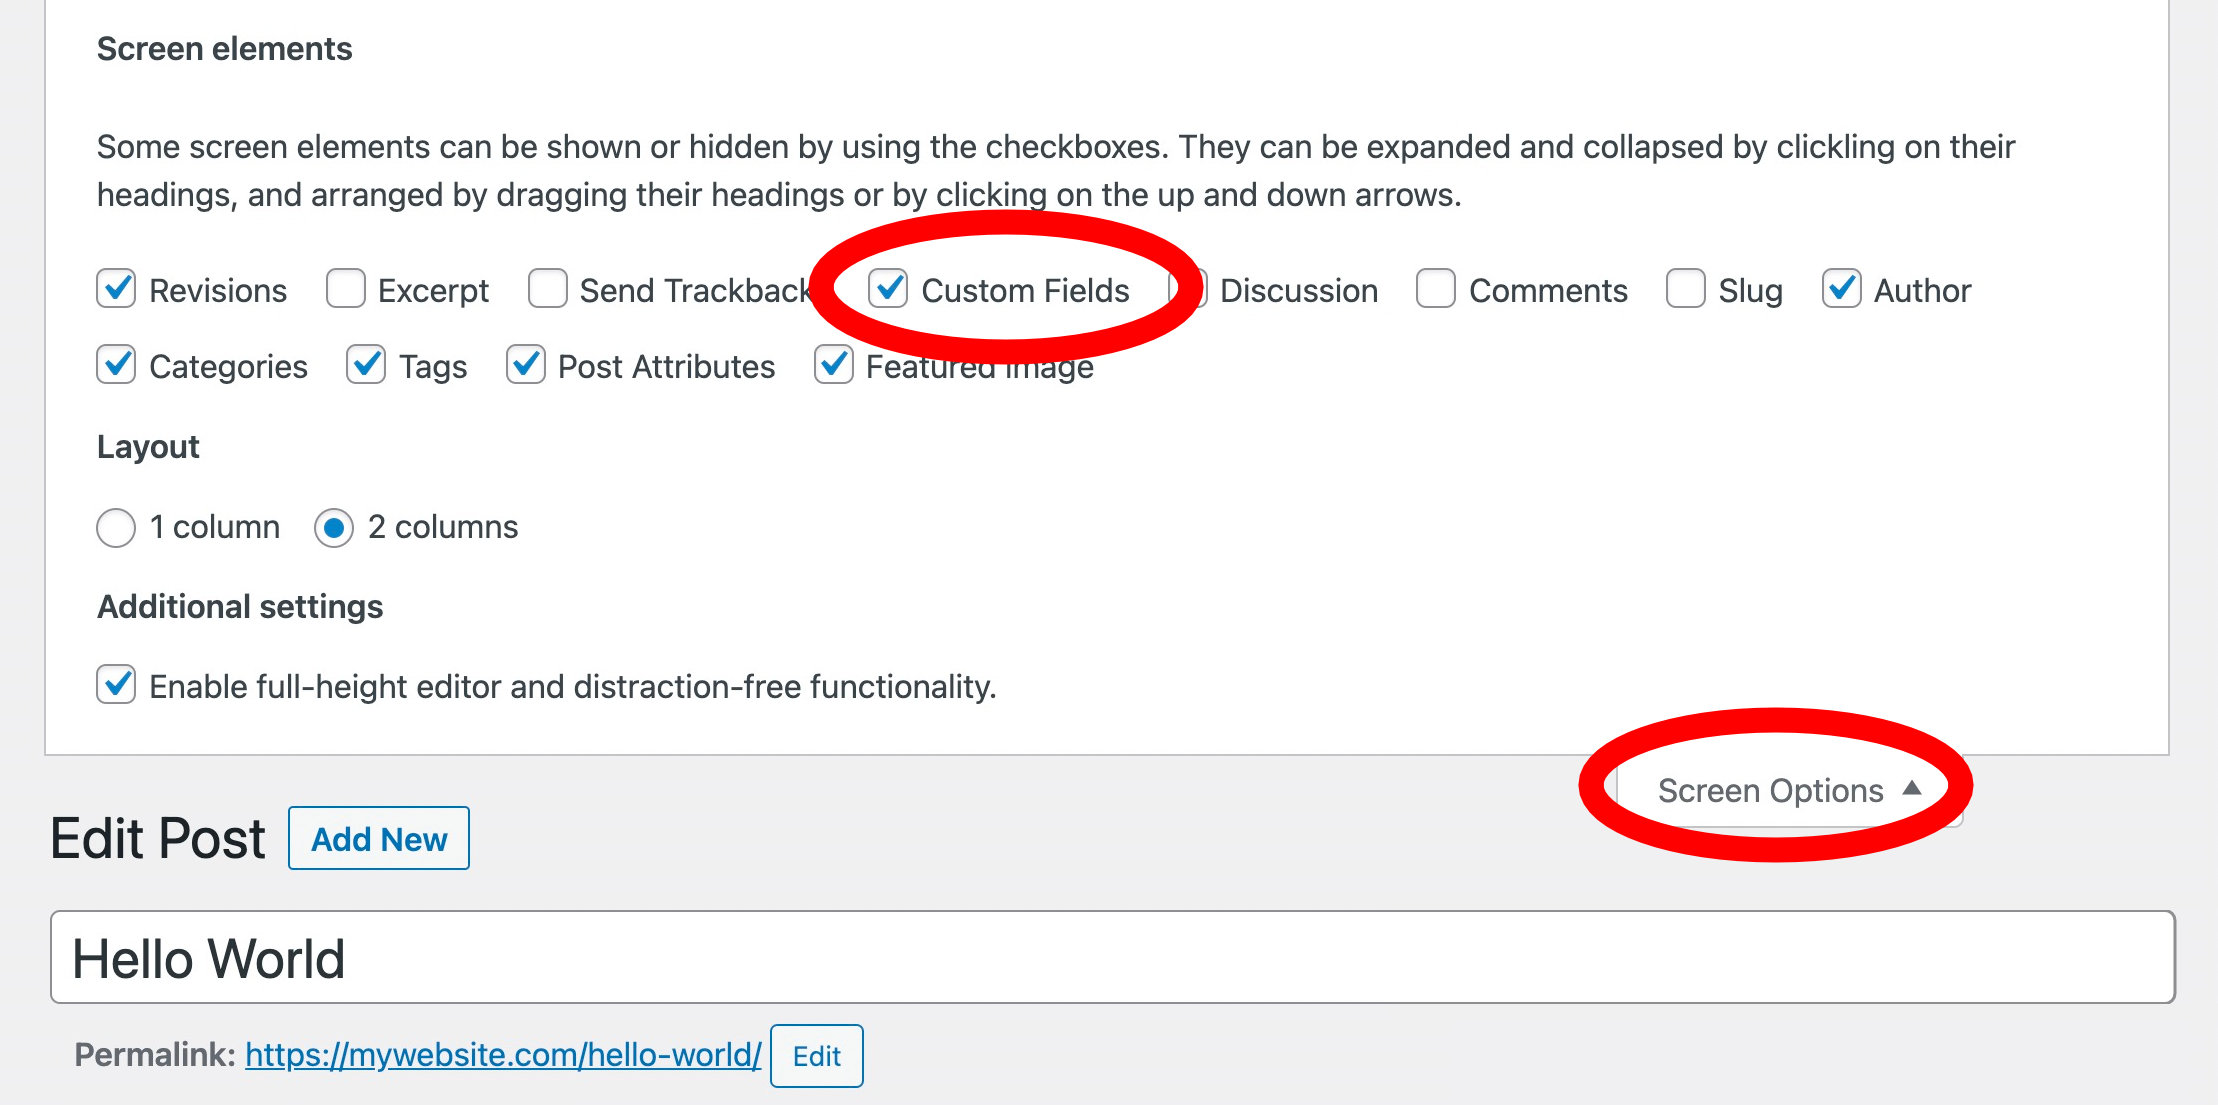
To enable WordPress custom fields while using the Classic Editor plugin, follow these steps:
- On the WordPress Edit Screen for pages or posts, access the Screen Options panel located in the upper right corner.
- Mark the checkbox for Custom Fields.
- The Custom Fields panel will now become visible beneath the Classic Editor.

Add a WordPress Custom Field
To add a WordPress custom field:
- Input the name (key) for your custom field and provide a value for the field.
- Apply the changes by clicking Publish.
If you have previously added WordPress custom fields, you'll notice a dropdown menu that presents a list of all existing custom fields. To add a new custom field, click on the Enter New button.

Apply WordPress Custom Field
A WordPress custom field can be assigned to a row, column, or module option using the following steps:
- Access the specific row, column, or module to which you intend to apply the WordPress custom field.
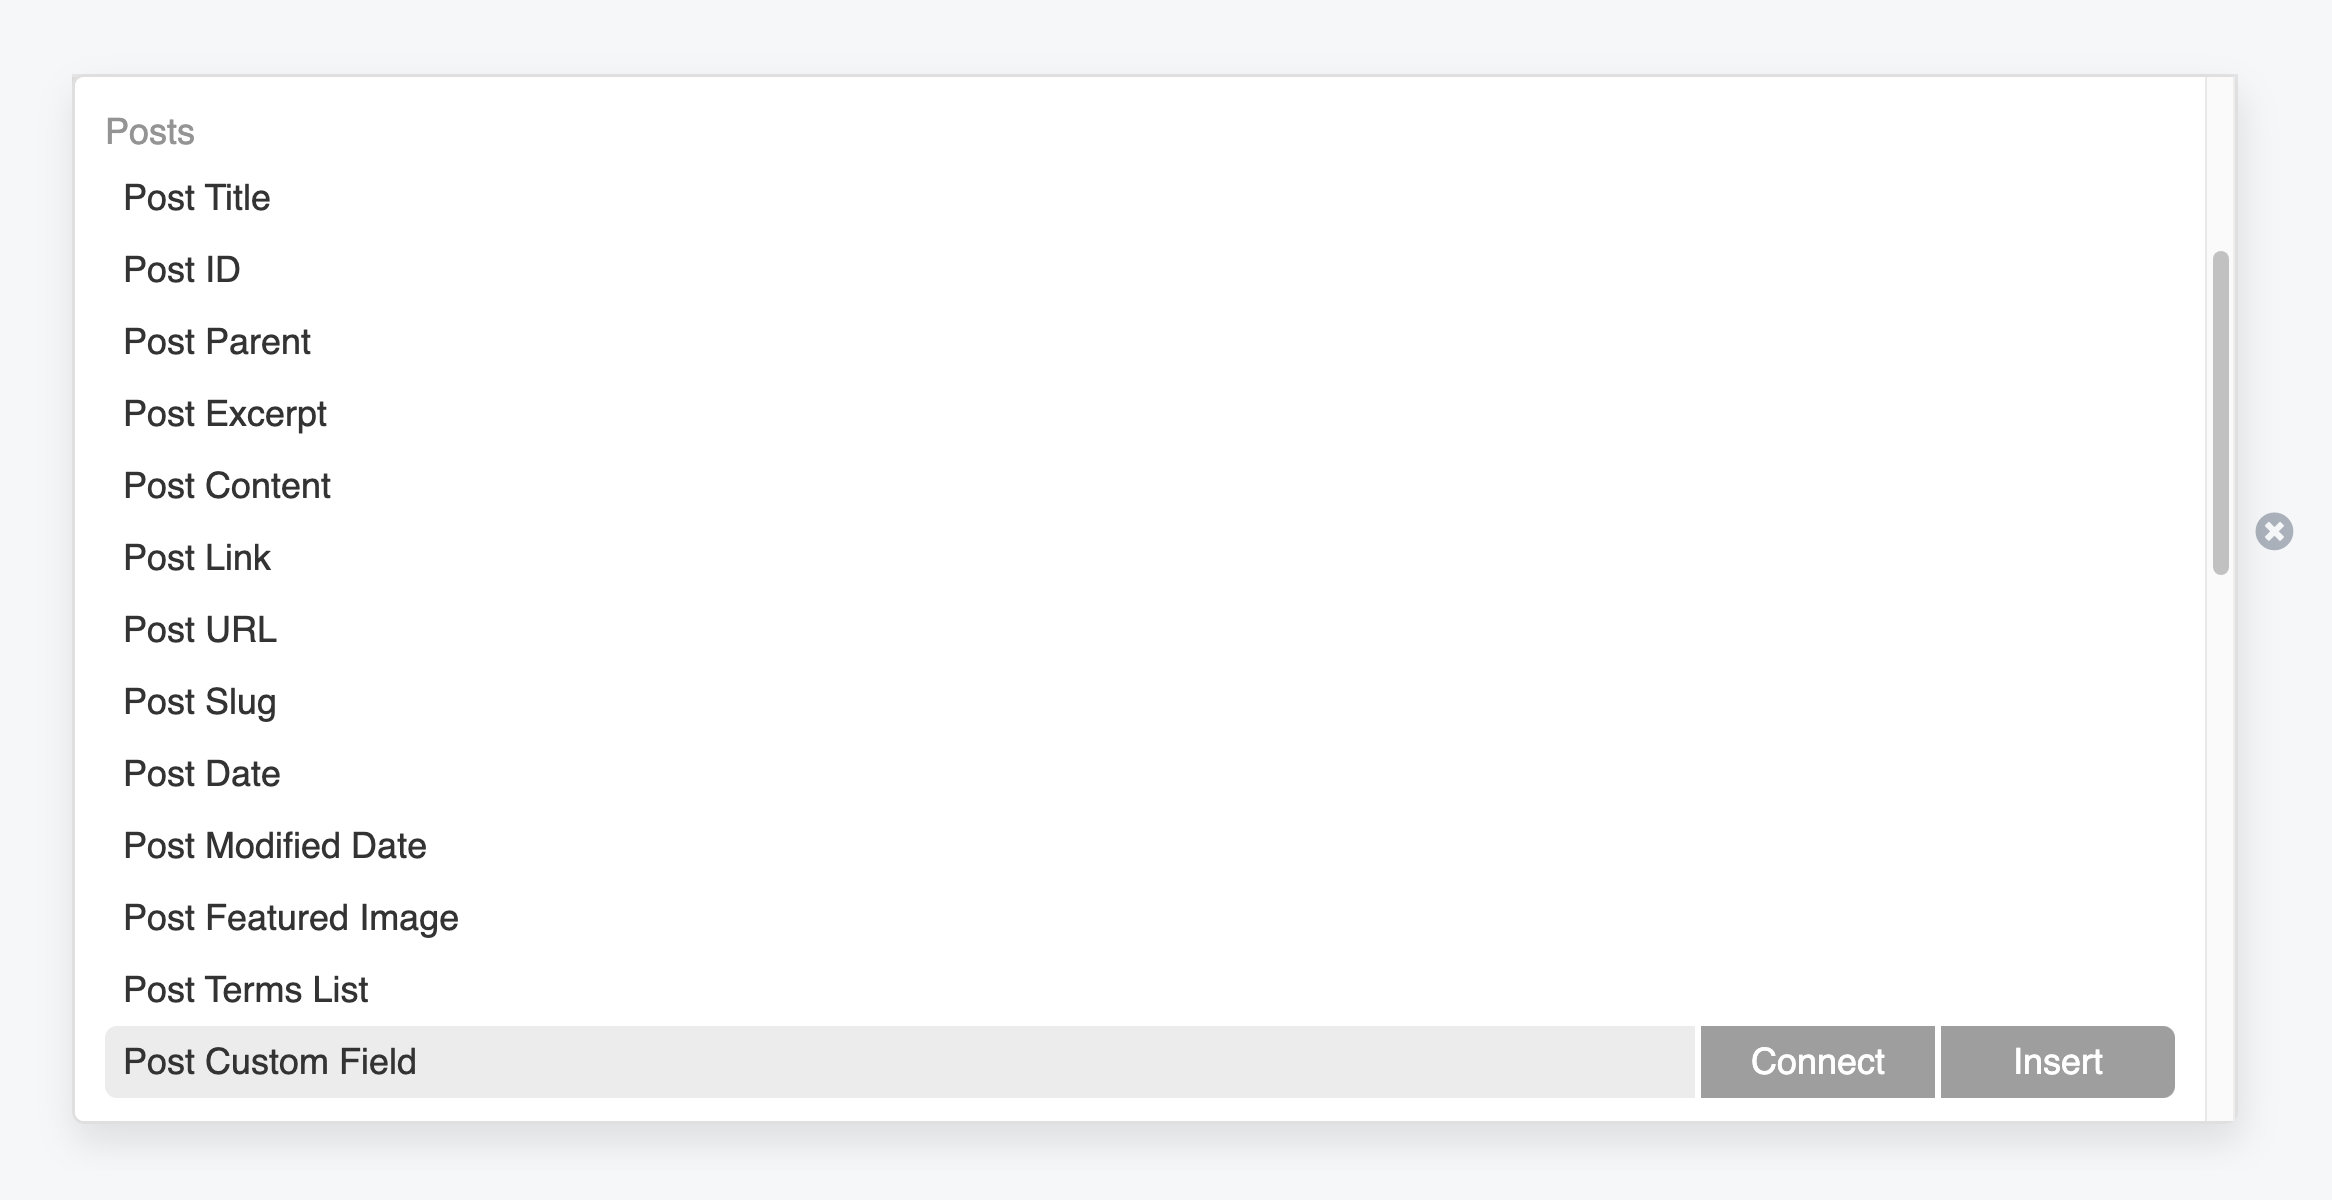
- Click the Field Connection toggle and within the Field Connection menu, choose Post Custom Field.
- Select either Connect or Insert to apply the WordPress custom field onto the chosen option.

WordPress Custom Field Shortcode
You also have the option to display WordPress custom fields within your layouts using the Field Connection shortcode. This can be accomplished by choosing Post Custom Field from the Field Connection Menu and then inputting the field name (key).
[wpbb post:custom_field key='FIELD_NAME']
Conditionals & Expressions Support
WordPress custom fields also have support for conditionals and expressions.
Conditionals
The following code provides a simple example of the syntax used for applying conditionals with your WordPress custom field connection shortcodes.
[wpbb-if post:custom_field key='FIELD_NAME']

  <p>Show this if TRUE.</p>

[wpbb-else]

  <p>Show this if FALSE.</p>

[/wpbb-if]
Check out the Conditional article to delve deeper into understanding how conditionals work. Also, take a look at the Conditional Examples article for more instances that showcase how conditionals can be applied.
Expressions
The following code provides a simple example of the syntax used for applying expressions with your WordPress custom field connection shortcodes.
[wpbb-if post:custom_field key='FIELD_NAME' exp='equal' value='Beaver Builder']

  <p>This content will only display if the field's value is Beaver Builder.</p>

[/wpbb-if]
Check out the Expressions article to delve deeper into understanding how expressions work. Also, take a look at the Expression Examples article for more instances that showcase how expressions can be applied.