Tools Tab
The Tools tab in the Beaver Builder settings lets you control which post types can use Beaver Builder.
Access Tools tab
- Access your site's WordPress Admin Dashboard.
- Navigate to Settings > Beaver Builder.
- Then click the Tools tab.
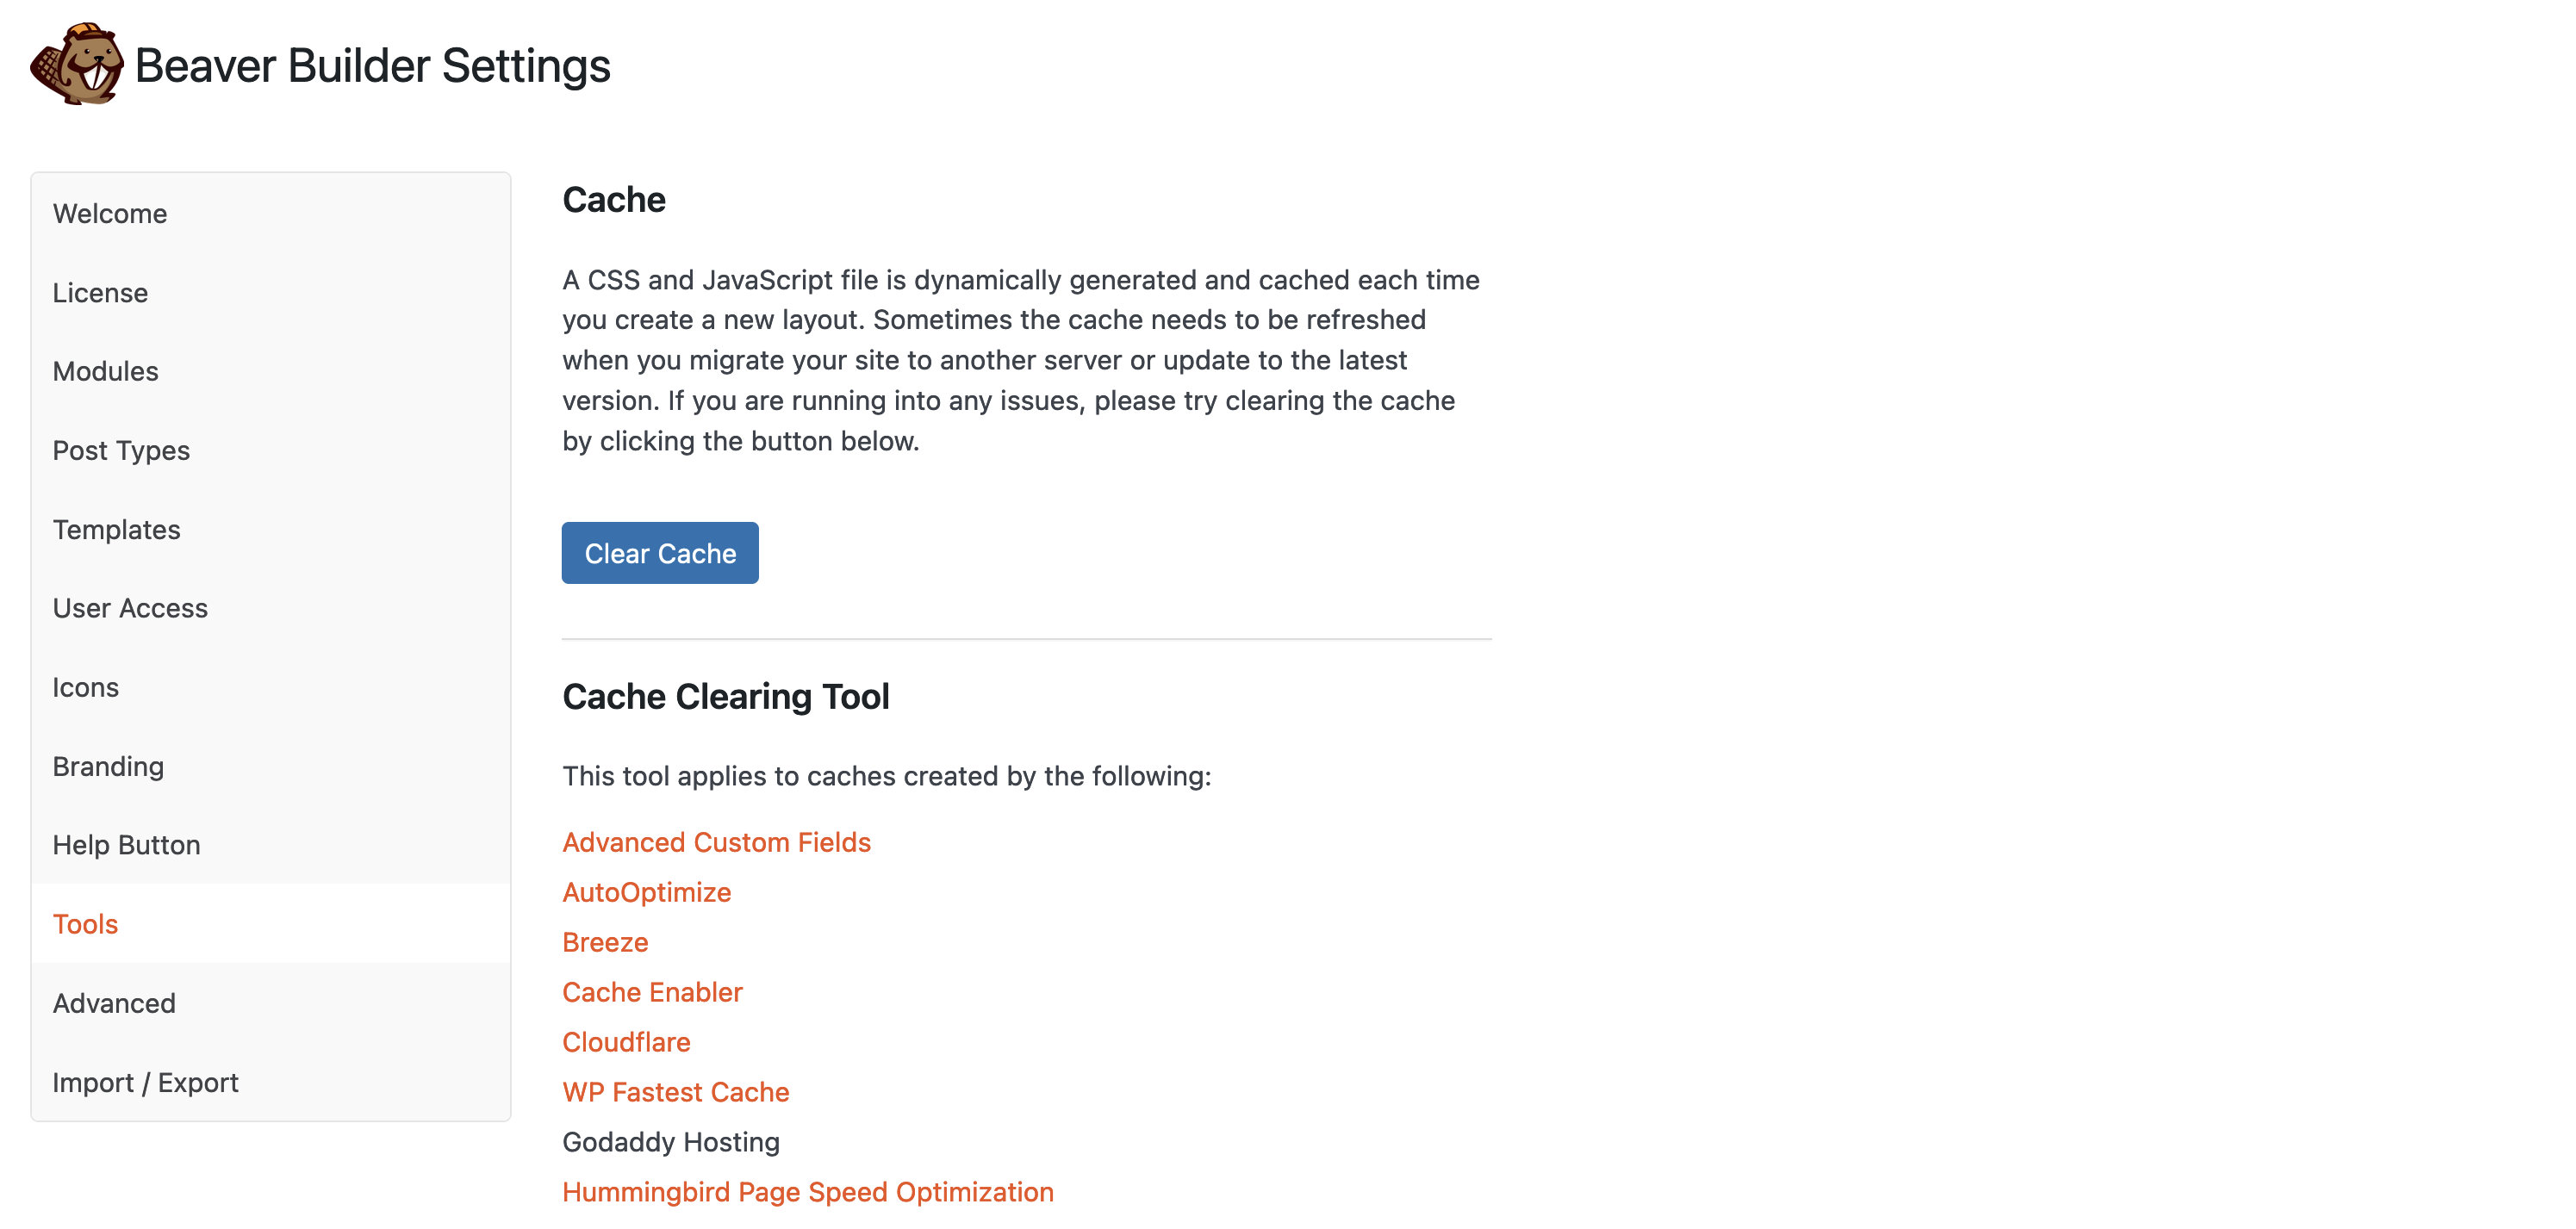
Cache
A CSS and JavaScript file are dynamically generated and minified whenever you create a new layout. The files are stored in the wp-content/uploads/bb-plugin/cache directory, where they are used to improve performance. The following actions result in the deletion and creation of these files automatically:
- Updates are made to a page, post, or custom post type.
- The Beaver Builder plugin is updated.
- Site URLs change, such as when migrating a site to another location.
- Enabling Beaver Builder Debug mode or setting
WP_DEBUGto true in your wp-config.php file.
Manually clear cache
Even though these cache-clearing triggers occur for most cases, you can manually clear the cache as part of troubleshooting why pages are not refreshing as they should. Clearing the cache is a good first response to any issues that pop up where the result does not appear as you expect. To manually clear the Beaver Builder cache:
- On the Tools settings page.
- Click the Clear Cache button.
As an alternative, you can delete the contents of the Beaver Builder caching directory by deleting all of the files in the folder wp-content/uploads/bb-plugin/cache.
On WordPress Multisite installations, the Clear Cache button button applies to all sites on the network when accessed as the Network Admin.
Cache Clearing Tool
Beaver Builder has a built-in cache clearing tool that automatically clears caches created by popular cache plugins and services.
- Advanced Custom Fields
- AutoOptimize
- Breeze
- Cache Enabler
- Cloudflare
- Godaddy Hosting
- Hummingbird
- Kinsta Hosting
- Nginx Helper
- Object Caching
- Pagely Hosting
- Pantheon Hosting
- SiteGround Hosting
- SpinupWP
- Swift Performance
- W3 Total Cache
- WP Fastest Cache
- WP Super Cache
- WPEngine Hosting
The cache is cleared under the following conditions:
When WordPress finishes updating plugins and themes.
When Beaver Builder editor is active. This works by defining the
DONOTCACHEPAGEconstant while the page is being edited. This constant is respected by most caching plugins.When layouts and templates are saved in the Beaver Builder editor.
Enable proxy cache clearing
Some hosting companies use a proxy cache like Varnish or Litespeed. Enable proxy cache clearing attempts to invalidate the cache using a remote request. You should leave it disabled if you're not sure whether your site is subject to a proxy cache.
Debug Mode
Enabling Beaver Builder Debug Mode generates a report that lets the Beaver Builder Support team quickly get information about your website's environment to help them troubleshoot.
Debug Mode forces Beaver Builder CSS and JavaScript files to be regenerated on each page load while enabled.
When debug mode is enabled, you can also edit any code you have added to the Global CSS and JavaScript settings from the Tools menu. This is useful for troubleshooting whether your custom code is causing a conflict with Beaver Builder.
If you have the Beaver Builder Theme active, you can also edit any code you have added to the BB Theme Code settings
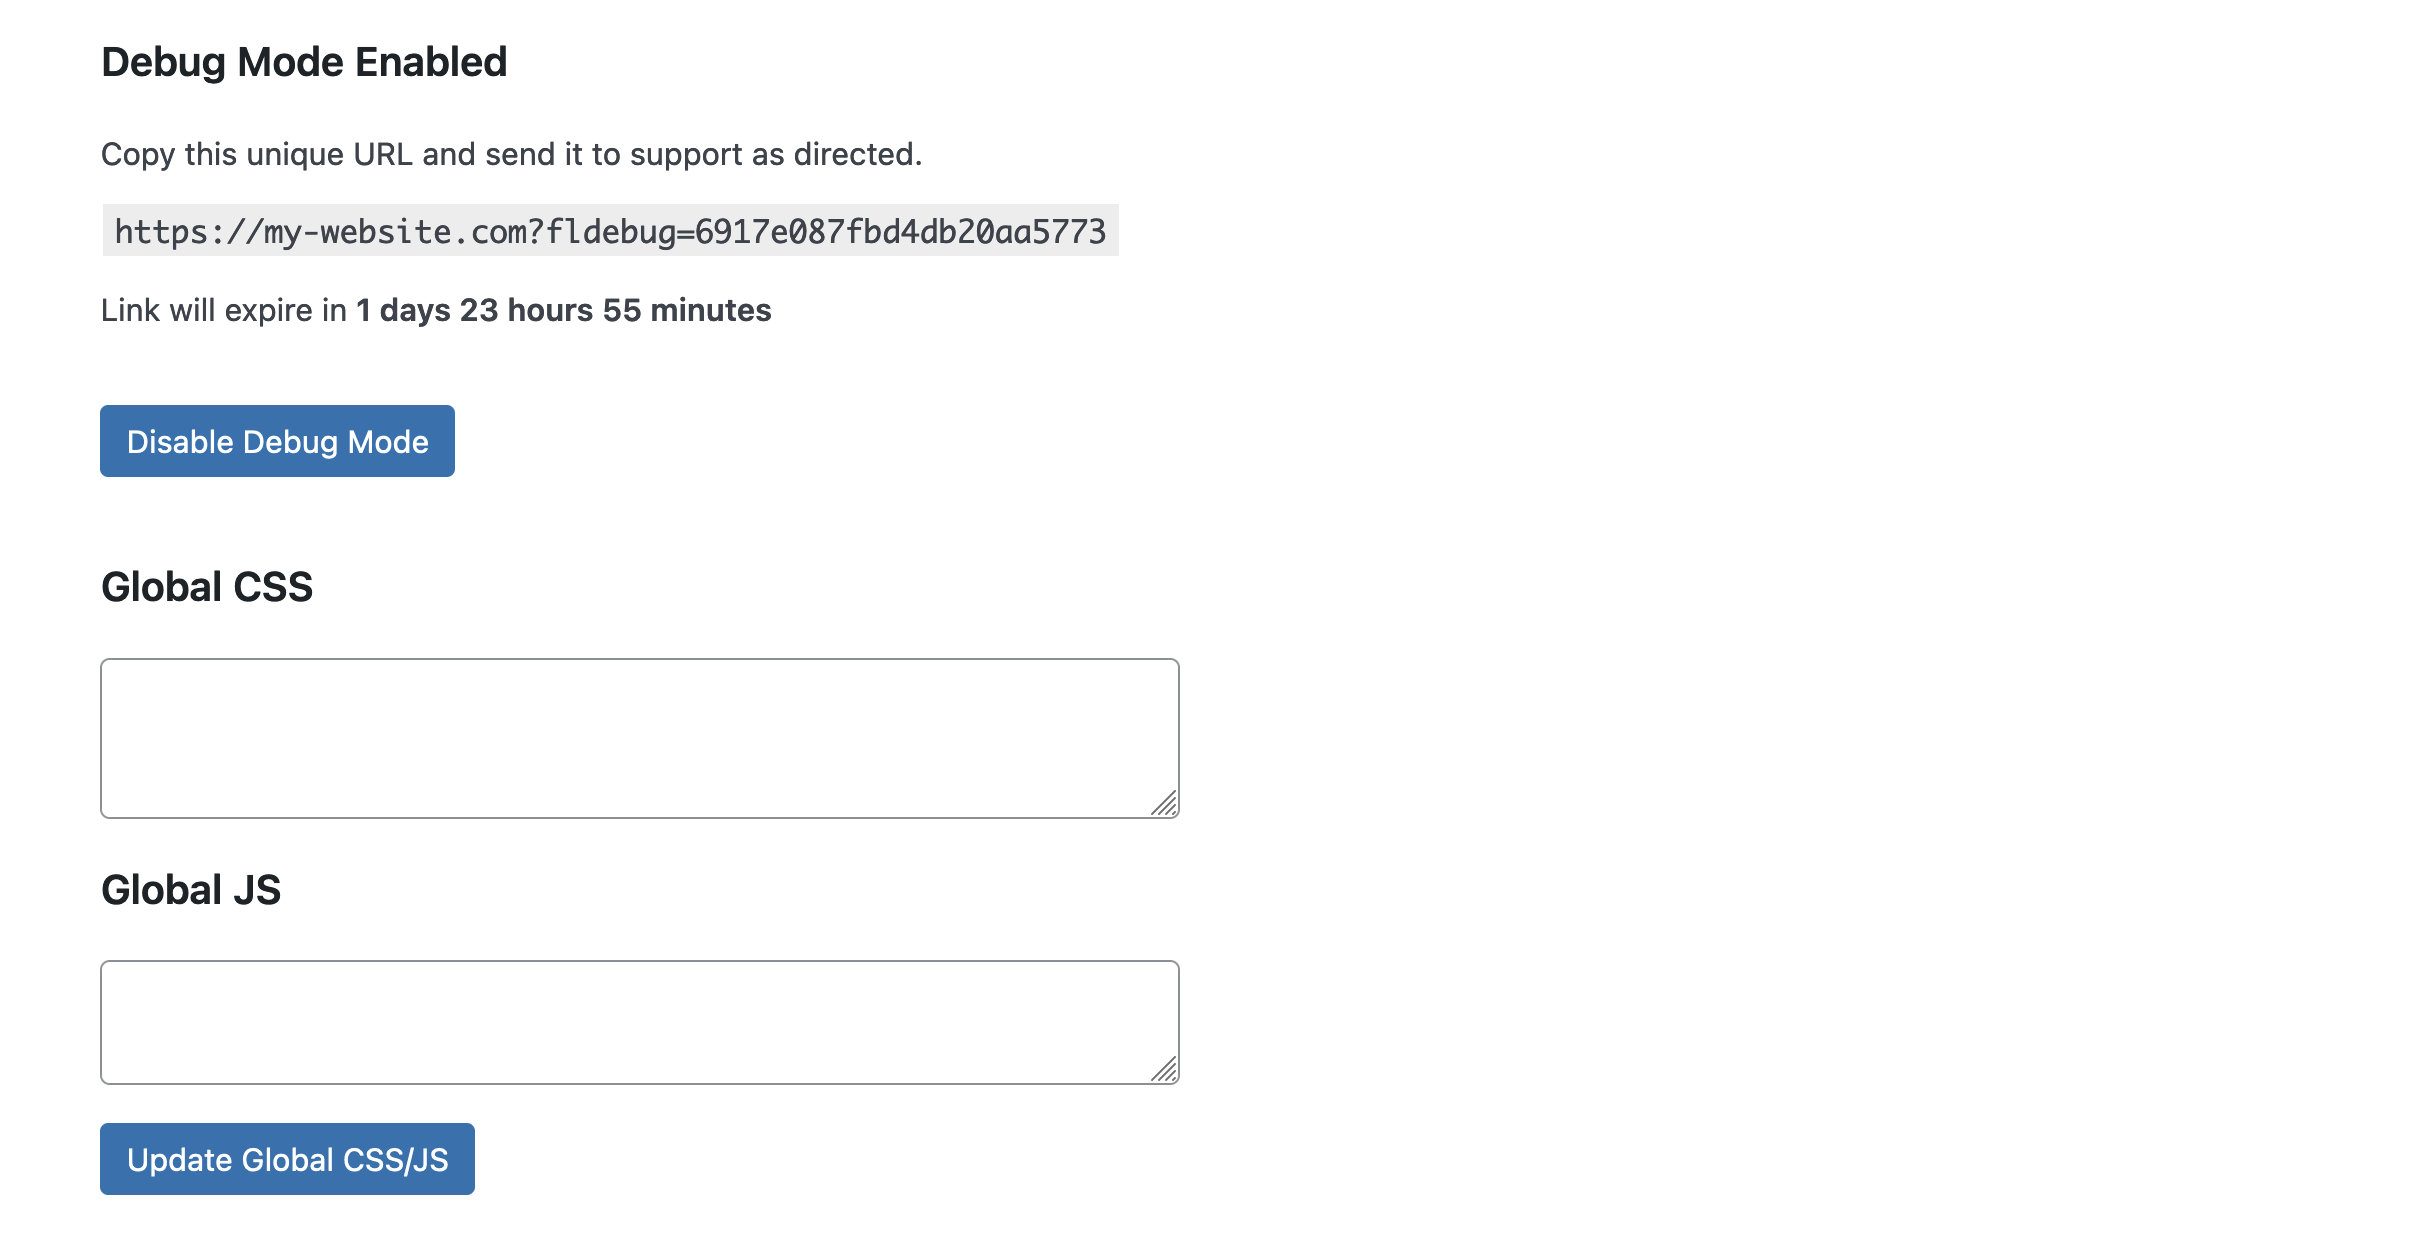
Entering Debug Mode produces a URL that contains a debug report. You can do any of the following things with the URL:
- Copy it into your browser to view the debug report.
- Add the URL when you submit a support ticket.
Enable Debug Mode
To enable Beaver Builder Debug Mode and obtain the URL for the debug report:
- On the Tools settings page.
- Click the Enable Debug Mode button.
- The URL appears just above the button. Copy the URL and paste into your browser's address bar or in your support ticket.
There are no security risks from having Debug Mode enabled. Debug Mode is automatically disabled after 48 hours.
You can also disable it manually on that tab after you know that Support has accessed the report. Once Debug Mode is disabled, the report is deleted.
Show Errors
Beaver Builder debug mode doesn't output errors by default. After enabling Debug Mode, add the parameter /?showerrors to your URL to view errors.
https://my-website.com/?showerrors
Prefix showerrors with the & symbol (delimiter) if the URL already contains GET parameters. As an example, if Beaver Builder is enabled on a page, the URL for showerrors would look as follows:
https://my-website.com/?fl_builder&showerrors
PHP Info
You can also use Beaver Builder debug mode to display your website's PHP configuration, also known as phpinfo. After enabling Debug Mode, add the parameter &info to your debug URL to view your PHP configuration.
https://my-website.com/?fldebug=a12340b6390778c2geg3f832aaf1ae31&info
Prerelease Updates
Enabling prerelease updates applies to all Beaver Builder products that you have installed. If you want updates to apply to only one product, follow the instructions on the Alpha & Beta releases article.
There is no support provided for alpha or beta releases and it is strongly discouraged to use them in production environments. There is a high risk of bugs and features can be changed or removed based on testing and feedback.
Enable Beta updates
- Access your site's WordPress Admin Dashboard, go to Settings > Tools.
- On the Tools tab, scroll to the Prerelease Updates section.
- Select the checkbox Enable Beta updates.
- Click Save Prerelease Settings.
Enable Alpha updates
We don't encourage this setting, so you will not see it until you have enabled beta prereleases in the previous section.
Access your site's WordPress Admin Dashboard, go to Settings > Tools.
On the Tools tab, scroll to the Prerelease Updates section.
Select the checkbox Enable Alpha updates. If you don't see this checkbox, enable Beta updates first and save.
Click Save prerelease settings.
Send Usage Data
Disabled by default. If Enabled, anonymous usage stats are collected. This data is used by the Beaver Builder team to get an understanding of the range of environments in which Beaver Builder is being used.
This data should not impact the performance of your site. It will be collected periodically with a cron job. No matter whether you choose to share or not, you can enable or disable at any time.
We do not collect any personal information such as your name, email, or IP address, so we can not identify you from that data.
Uninstall
When you click Uninstall, Beaver Builder will be removed from your site and data from your database.
On WordPress Multisite installations, the Uninstall button applies to all sites on the network when accessed as the Network Admin.
What data is removed
The following data will be deleted from your wp_options table:
_fl_builder_settings_fl_builder_enabled_modules_fl_builder_enabled_templates_fl_builder_templates_override_fl_builder_templates_override_rows_fl_builder_templates_override_columns_fl_builder_templates_override_modules_fl_builder_post_types_fl_builder_enabled_icons_fl_builder_branding_fl_builder_branding_icon_fl_builder_theme_branding_fl_builder_user_access_fl_builder_help_button_fl_builder_color_presets
The Uninstall process will also remove _fl_builder_launched from the wp_usermeta table.
You can remove Beaver Builder from the WordPress Admin Dashboard > Plugins page instead if you do not wish to delete the data.
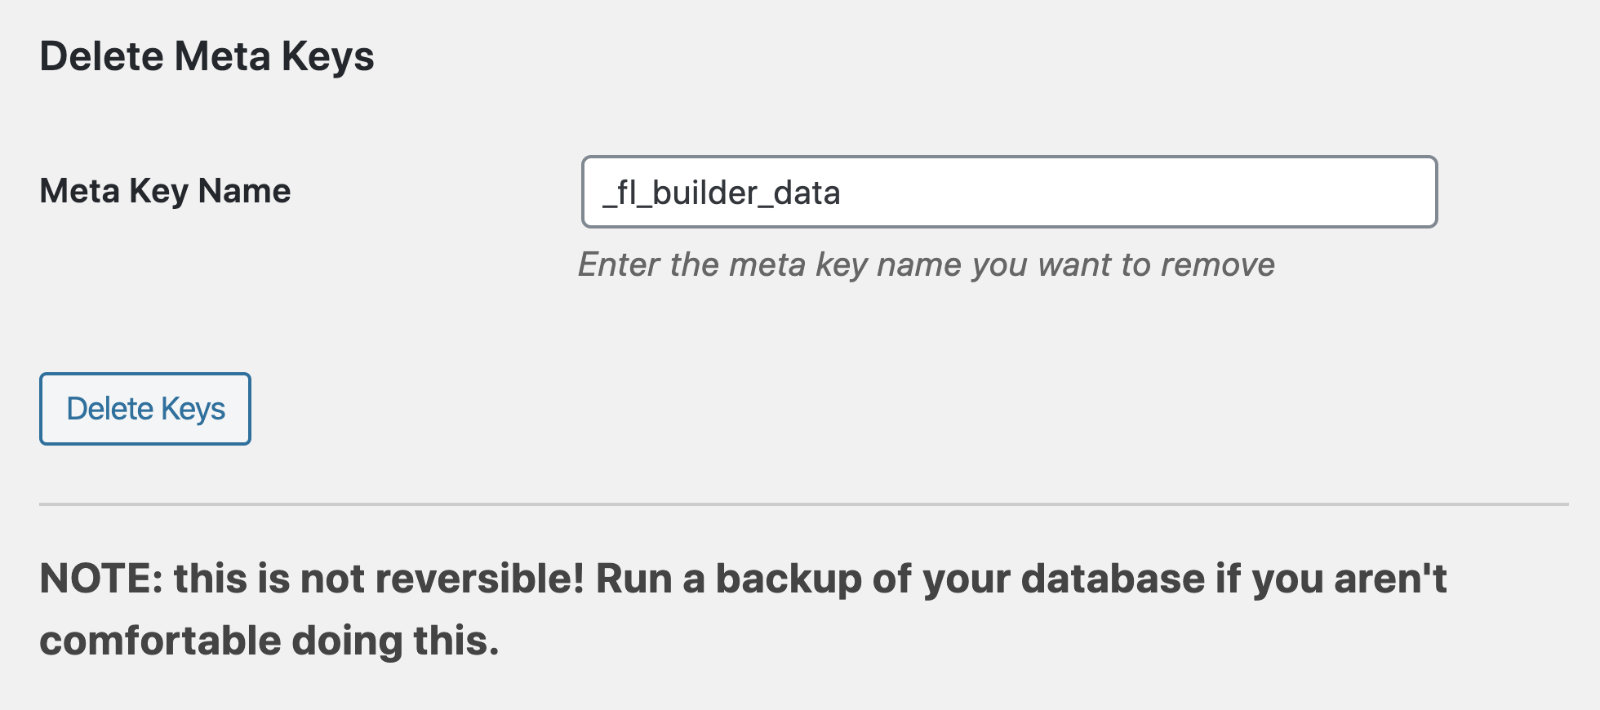
What data remains
Even if you Uninstall the Beaver Builder plugin, there are some wp_postmeta values that get left behind, just in case you'd ever want to restore your layouts. If you would like to remove these meta values to completely remove Beaver Builder – in other words, if you're sure you'll never want to revert your content to Beaver Builder layouts – you can use the function delete_post_meta_by_key.
The easiest way to do this is to the the Post Meta Manager plugin. After installing, go to WordPress Admin Dashboard > Tools > Post Meta Manager and enter the following keys one by one in the Delete Meta Keys section to completely wipe all builder data:
_fl_builder_data_fl_builder_data_settings_fl_builder_draft_fl_builder_draft_settings
What happens after
When you remove Beaver Builder using Uninstall, here is what happens.
- A stripped-down HTML version of your layout is copied to the native WordPress editor.
- Your content layouts may not look exactly the same as when the plugin was active, but you won't lose your content.
- Your settings under WordPress Admin Dashboard > Settings > Beaver Builder are deleted, and the cache is cleared.
- In technical terms, uninstalling with this method deletes the cache files and options from the
wp_optionstable, but it doesn’t delete any layout data in thewp_postmetatable. - If you reactivate the plugin, your content layouts are restored and available for editing in Beaver Builder, but you must manually add information back to WordPress Admin Dashboard > Settings > Beaver Builder.