ACF Blocks
This article covers everything related to using ACF Blocks in Beaver Builder including why it’s useful, how it works, and how to create your first block.
ACF Blocks require Advanced Custom Fields Pro.
What are ACF Blocks?
ACF blocks allow you to create configurable content (e.g. blocks or modules) that work in both Beaver Builder and Gutenberg. If you use Beaver Builder for site building and page layout and Gutenberg for post content, ACF blocks are for you.
See the ACF Blocks documentation for more information.
Accessing ACF Blocks in Beaver Builder
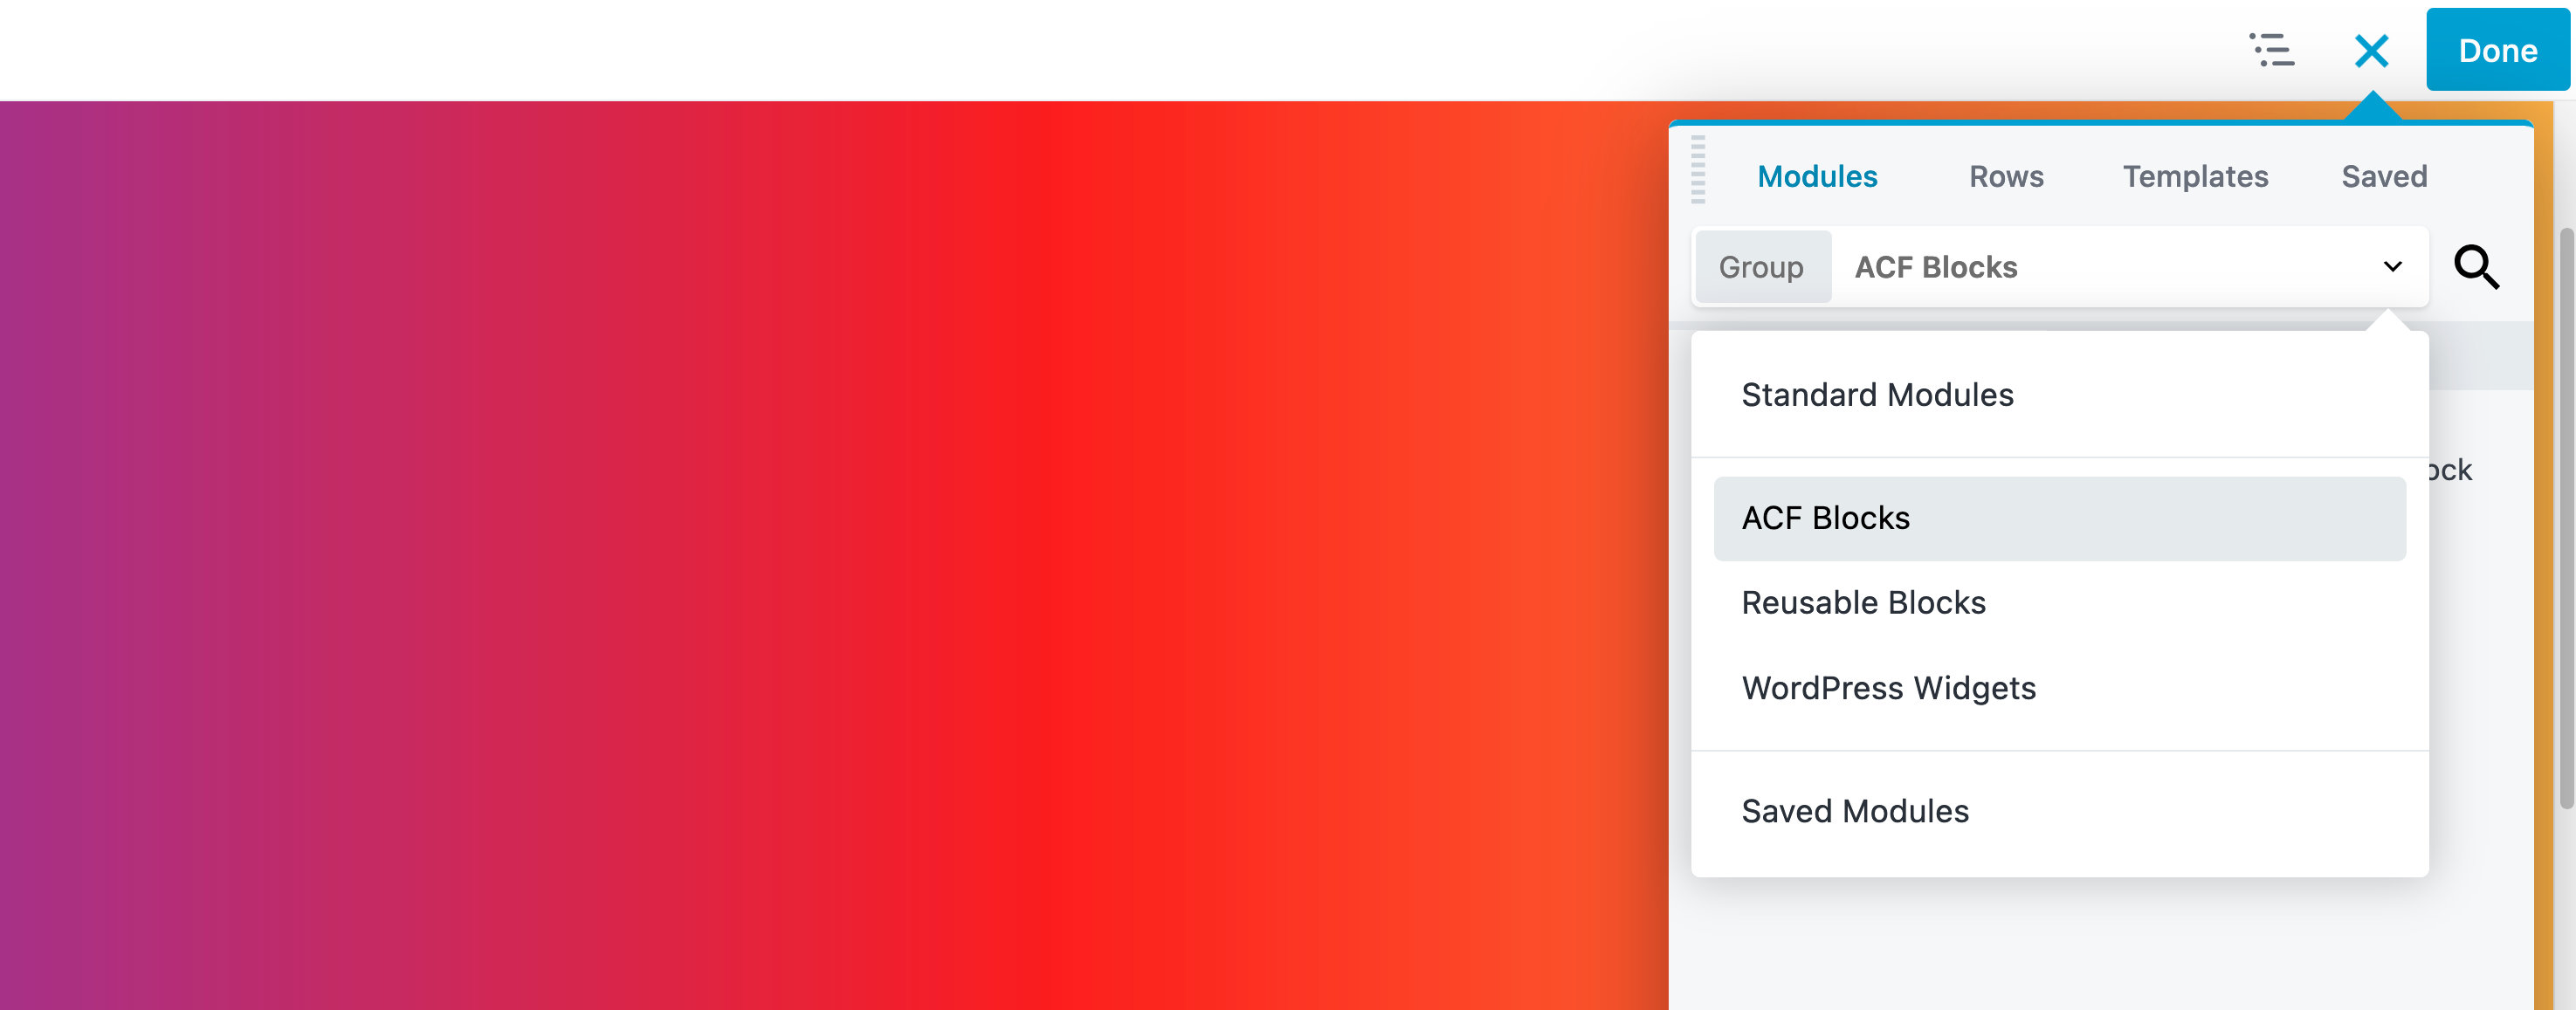
Blocks created with ACF can be found in The Content Panel under Modules > ACF Blocks subgroup. Any block categories or icons used to organize and display your blocks in Gutenberg will show there as well.
See the Defining Custom Groups section for customizing the group location of your ACF Blocks.
Creating an ACF Block For Beaver Builder
The documentation for ACF Blocks and WordPress handbook provide most of the information you need to create an ACF block in Beaver Builder. We have also created an example ACF blocks plugin you can use for reference.
The bare minimum required to create an ACF block is two files: block.json and template.php. It’s also possible to load style and script files specific to your block by defining those in block.json.
There are, however, a few things you should keep in mind.
JSX Support – Blocks that declare JSX support aren’t currently supported in Beaver Builder and won’t be available. When using
block.json, you need to explicitly set this toFALSEas shown in the example below and in Configuringblock.jsonsection."supports": {
"jsx": false
},Block Features – Beaver Builder doesn’t currently support additional block features that can be configured in block.json including things like alignment, colors, and variations. We only support the basics shown in the examples.
Configuring block.json
This is a standard WordPress block.json file with the addition of the acf param for defining where your template is located. Without that, you won’t be able to select it in ACF when building your form.
Additionally, this is where you need to set JSX support to FALSE, otherwise, your block won’t load in Beaver Builder. The paths to the template file (and style or script files) are relative to your block.json file and need to be stored in the same location.
{
"name": "acf/bb-example-acf-block",
"title": "ACF Example Block",
"description": "An example ACF block that can be used in Beaver Builder.",
"category": "bb-example-acf-blocks",
"icon": "admin-appearance",
"script": "file:./js/scripts.js",
"style": "file:./css/styles.css",
"supports": {
    "jsx": false
},
"acf": {
"mode": "preview",
"renderTemplate": "template.php"
}
}
Defining Custom Groups
You can assign your block to a group other than Standard Modules in The Content Panel by adding the following code to block.json.
"beaverBuilder": {
    "group": "ACF Blocks"
}
Example
{
    "name": "acf/bb-example-acf-block",
    "title": "ACF Example Block",
    "description": "An example ACF block that can be used in Beaver Builder.",
    "category": "bb-example-acf-blocks",
    "icon": "admin-appearance",
    "script": "file:./js/scripts.js",
    "style": "file:./css/styles.css",
    "supports": {
        "jsx": false
    },
    "acf": {
        "mode": "preview",
        "renderTemplate": "template.php"
    }
    "beaverBuilder": {
        "group": "ACF Blocks"
    }
}
Configuring template.php
The template.php file is where you output the content for your block. In it, you can query ACF fields like normal with get_field and use the result in your output. You should be familiar with this if you have previously worked with ACF.
<?php

$heading = get_field( 'heading' );
$content = get_field( 'content' );

?>
<div>
    <h3><?php echo $heading; ?></h3>
    <p><?php echo $content; ?></p>
</div>
Loading the Block
Once you’ve created the code for your block, you need to load it using the core function register_block_type. Your block won’t be available to select in ACF when building your form until you do this.
add_action( 'init', function() {
    register_block_type( 'path/to/block.json' );
} );
Creating the Block Form
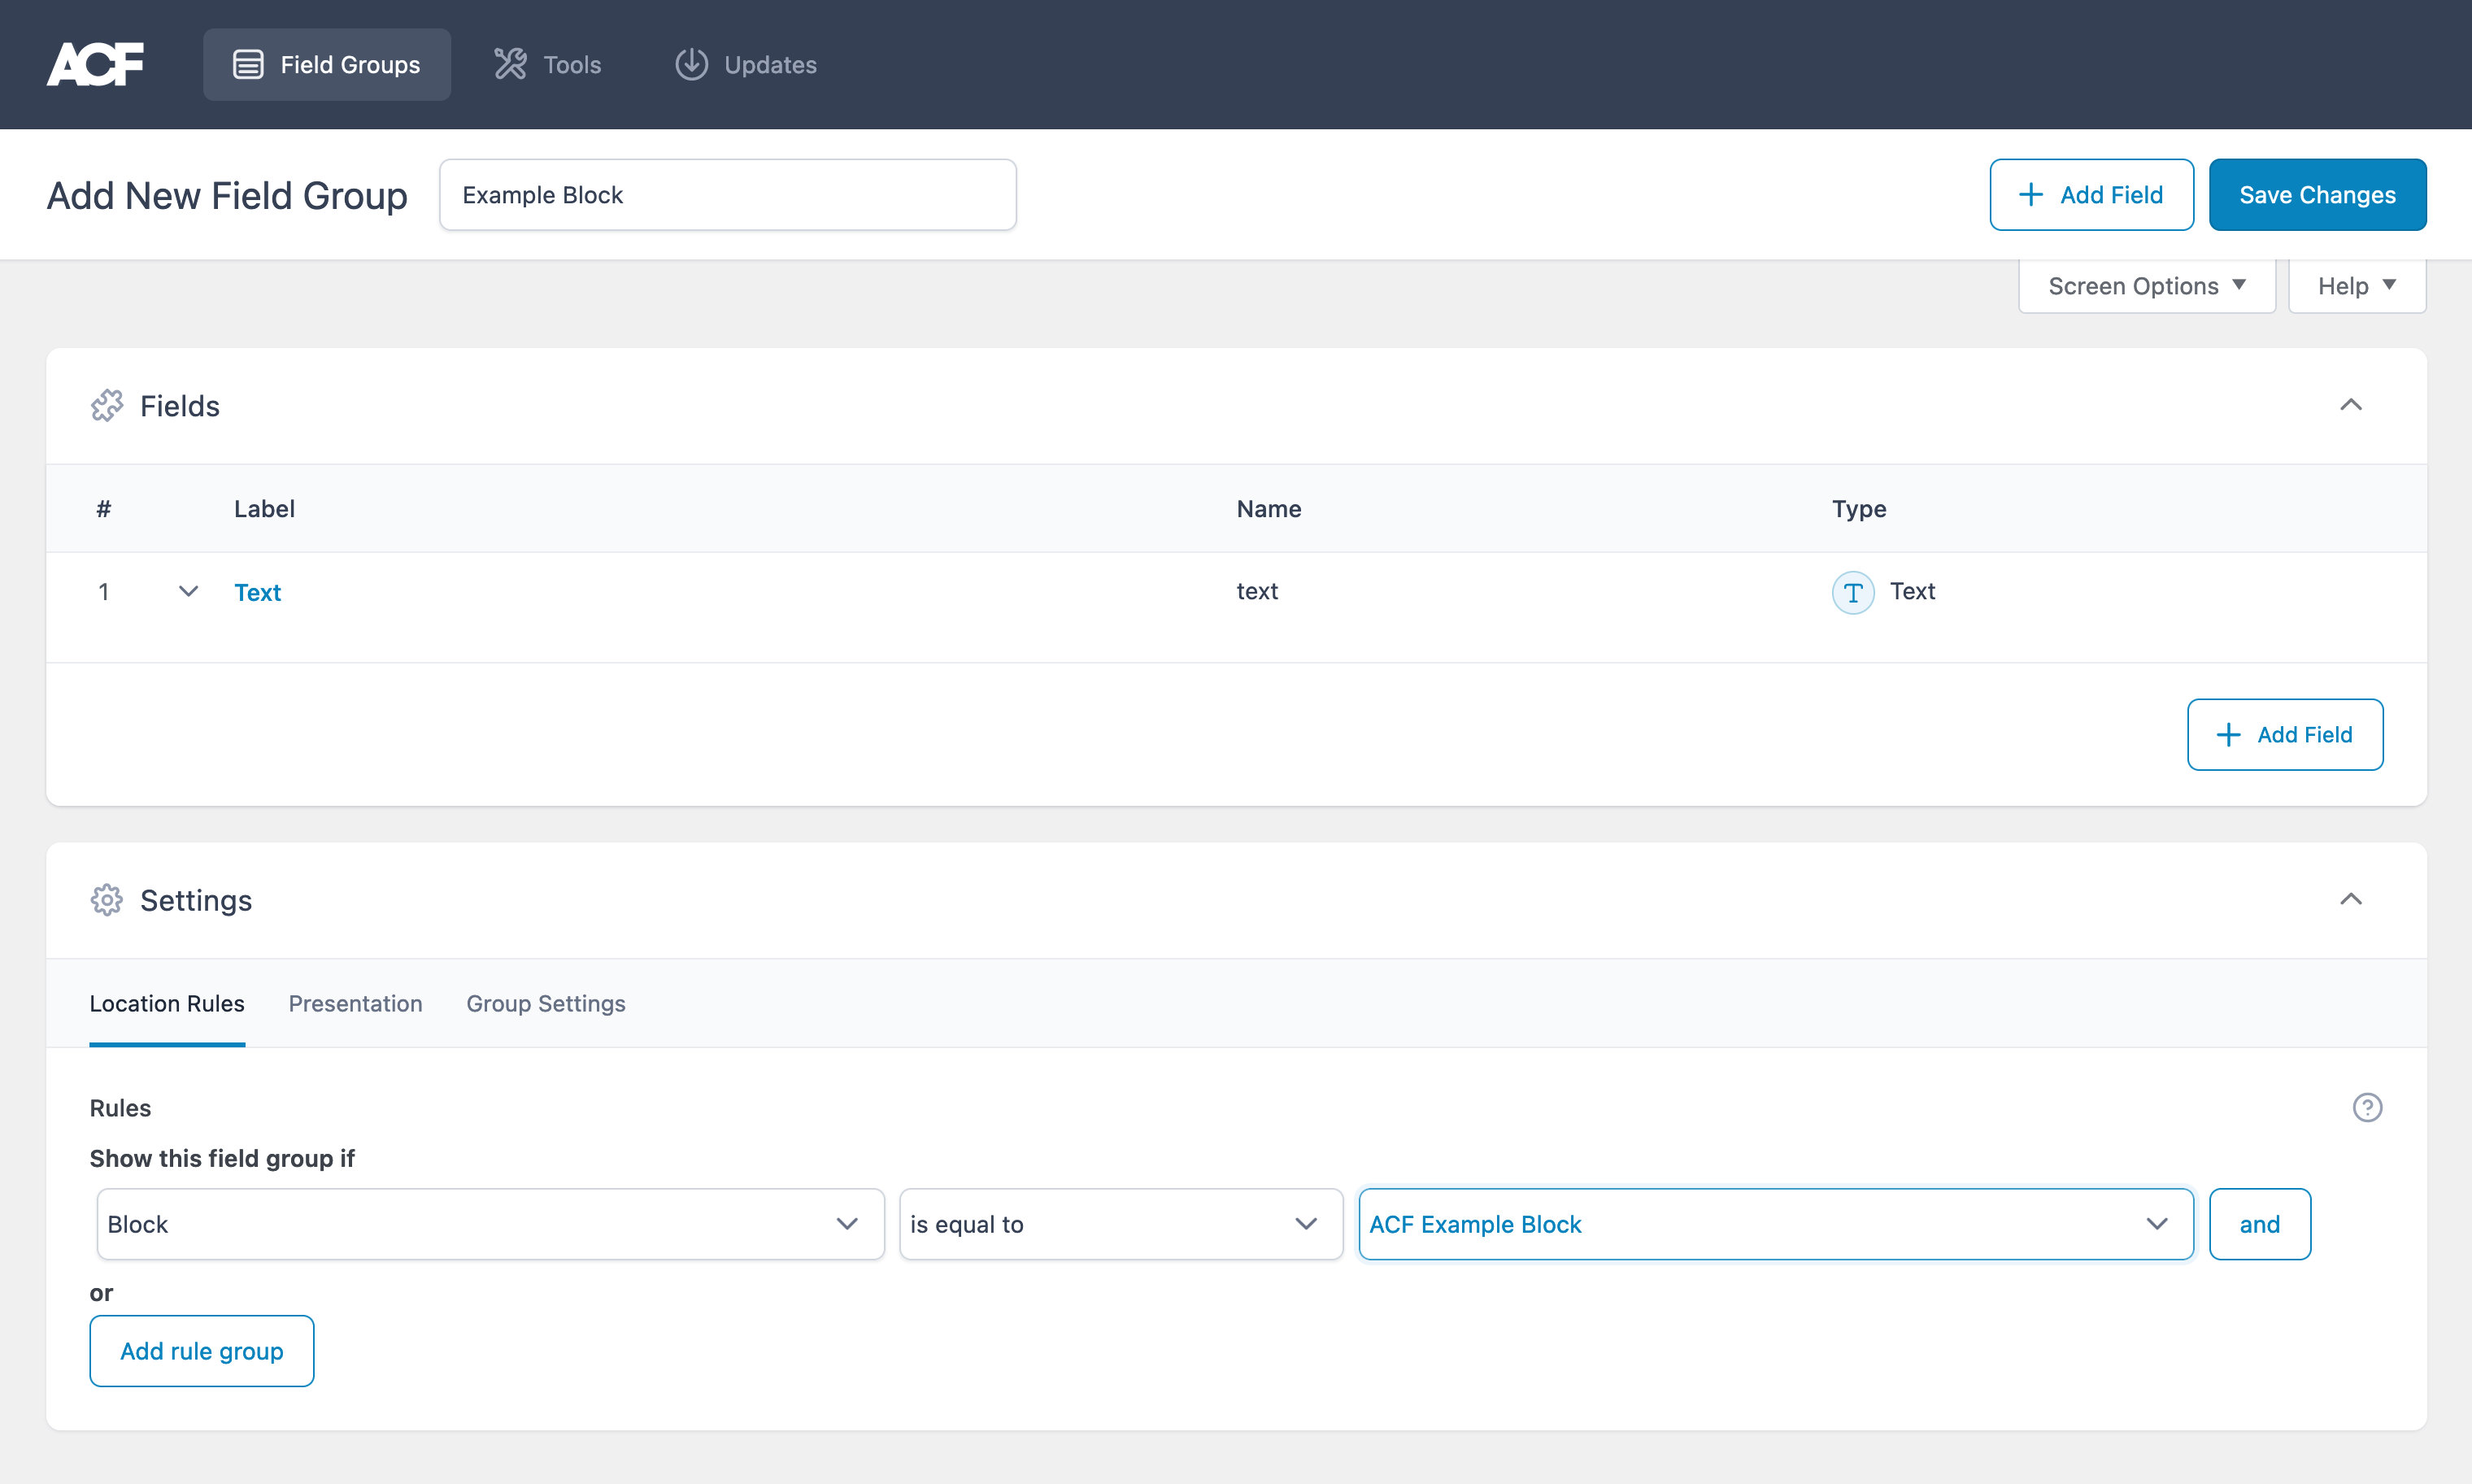
Now create the form for your block. You can do this before or after you code the block — it’s entirely up to you. The block won’t appear in the field group rules until you create the form.
If you’ve created an ACF form before, this should all be fairly standard. Simply create a form, set the location to your block, and your block is ready.
Exporting the Block Form
This step is optional but can come in handy if you’d like to ship your blocks in a plugin. Under ACF’s tools, you have the option to export or import fields as JSON. This will allow you to store your block’s form in a plugin and even manage it with version control.
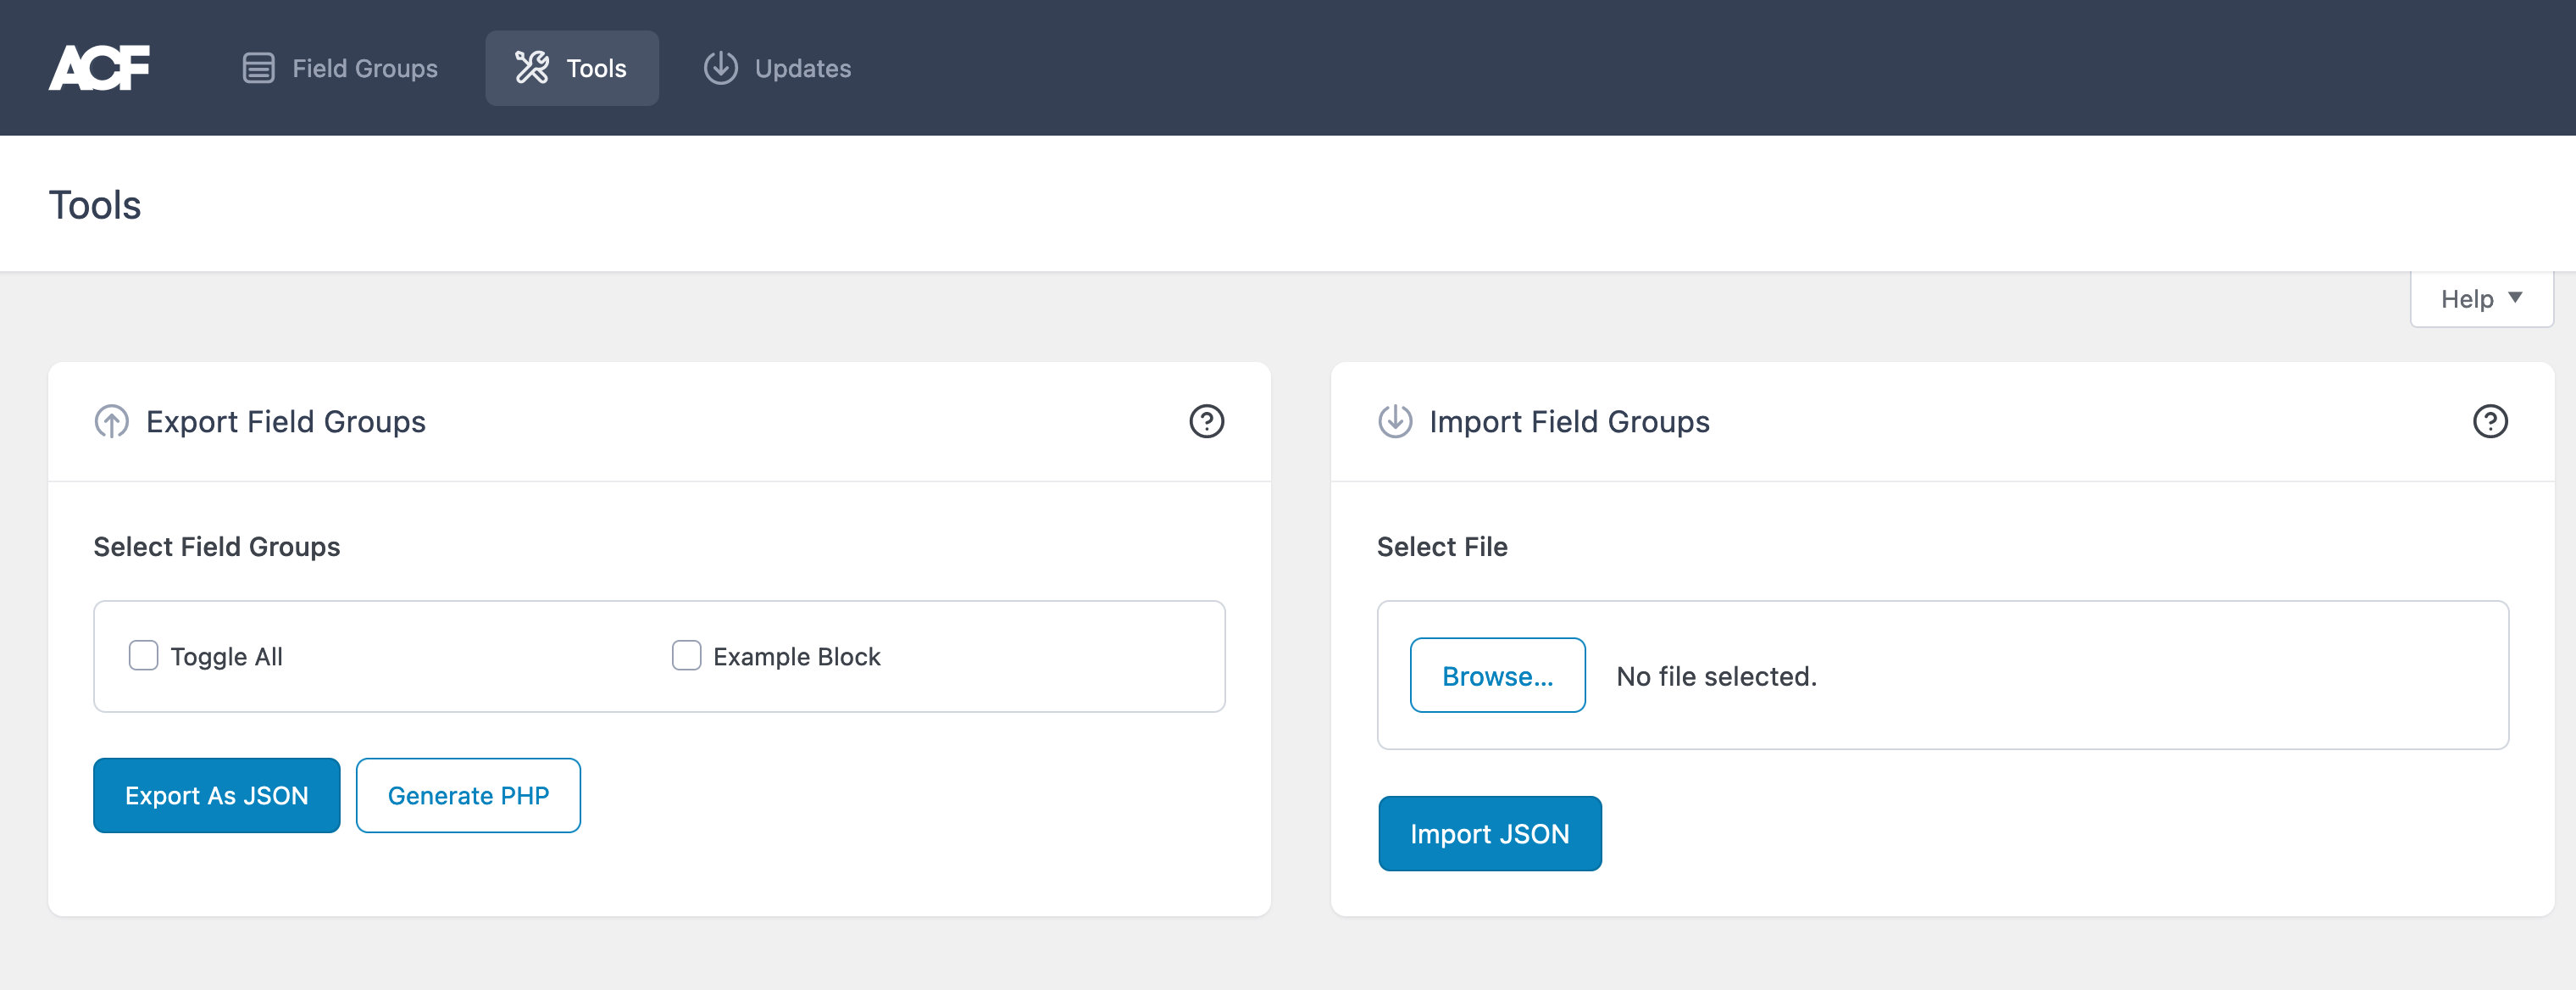
After exporting your block’s form, you can always reimport it later if you need to make changes. Once you’re done, just export it again and push those changes to your git repo.
ACF does provide a way to automatically handle JSON files but unfortunately, it only works with a single location. If you do that in a plugin, it could break something else on your site using ACF’s local JSON.
If you’re interested in working with fields this way, here’s how we’re loading them in the example plugin.
add_action( 'acf/init', function() {
    $fields = json_decode( file_get_contents( 'path/to/fields.json' ), 1 );

    /**
     * Only load if no fields exist in the database with this key.
        * This allows you to work on the fields if they have been imported.
     */
    if ( empty( acf_get_fields( $fields[0]['key'] ) ) ) {
        acf_add_local_field_group( $fields[0] );
    }
} );